Join a Session
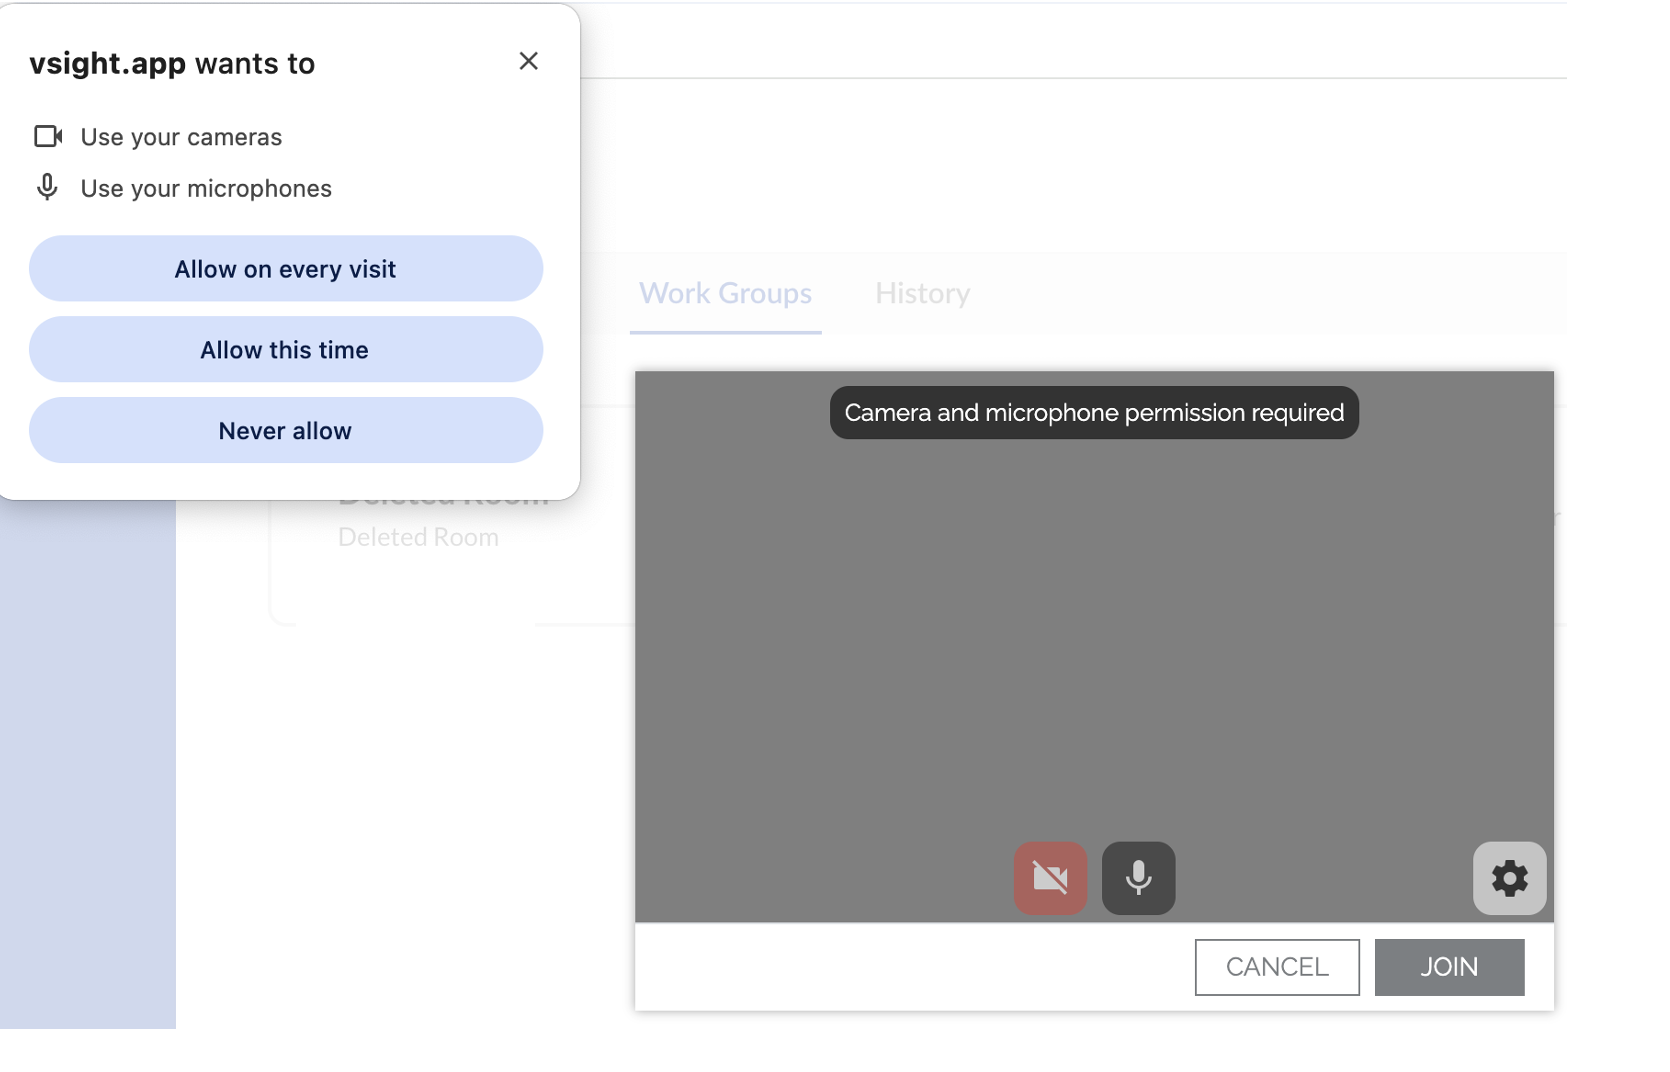
For the first session, you will be asked to allow the application access to your camera and microphone. This approval is necessary for VSight Remote to function, even if you choose to keep your camera and microphone turned off during the session.
✅ Tip: If you do not want to issue consent at each session, click “Allow on every visit”.
By clicking on the camera and microphone icon, you can control whether they are active or inactive when entering the session. Under Settings in the corner, you can select between available cameras and microphones. Click Join to start a session.
📌 Important: Your camera/microphone must not be in use by another application at the same time (e.g., during a Teams meeting) as it can disrupt the VSight Session.
User Interface
The user interface of the VSight Remote Session in the web application is identical, no matter whether you start the session via a call, a meeting, or a work group.
Main Interface Overview
Web application
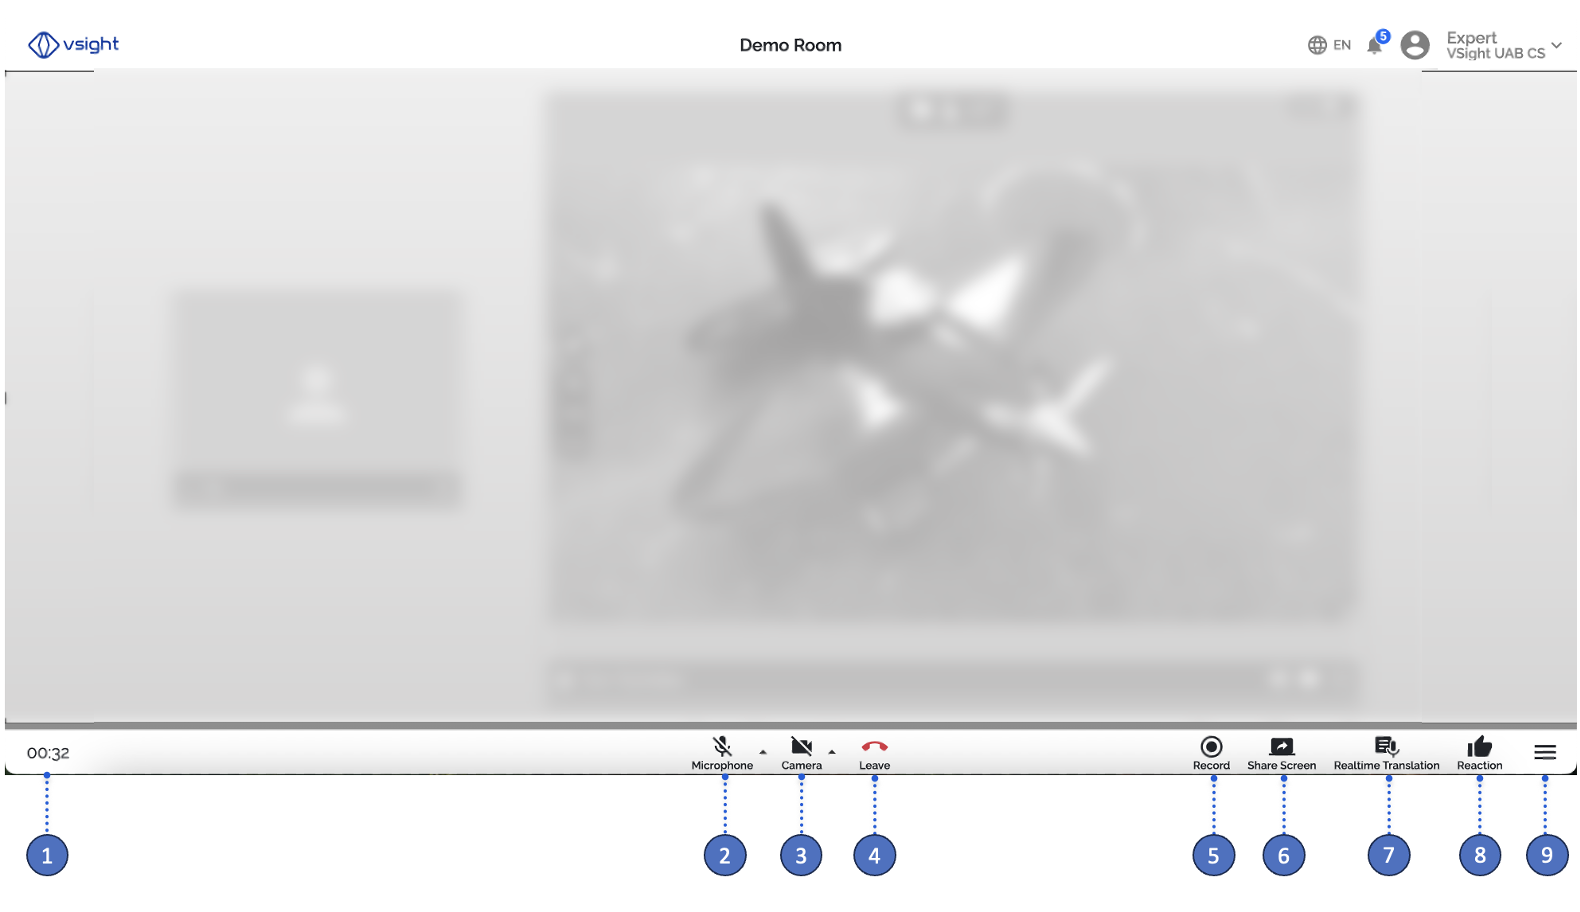
When you join a session in VSight Remote, you will see the main interface, which includes:
1️⃣ Session Duration – Displays the elapsed time of the session.
2️⃣ & 3️⃣ Microphone & Camera Settings – Click on the microphone or camera icon to activate or deactivate them. To change the audio/video source during the session, select the microphone or camera from the drop-down menu next to the respective icon.
📌 Important: If your internet connection is unstable, your video stream will automatically stop and switch to audio-only mode.
4️⃣ Leave Session – Click this icon to exit the session.
5️⃣ Record Session – To record a session manually, click the Record icon. A second click will stop the recording. Every recording is automatically stored in the admin panel.
6️⃣ Share Screen – Click the Share Screen icon to display your screen to all other users in the session. A second click on the icon will stop the screen sharing.
7️⃣ Real-Time Translation – Click the Translation icon to start real-time translation. Select the language you are speaking and your target language.
8️⃣ Send Reactions – Click the Reaction icon to send a thumbs up or thumbs down. Your chosen reaction, along with your name, will be displayed to all users in the main video stream for about 2 seconds.
9️⃣ Side Menu – Click this button to collapse or expand the side menu.
Mobile Devices (iOS and Android) and Smart Glasses
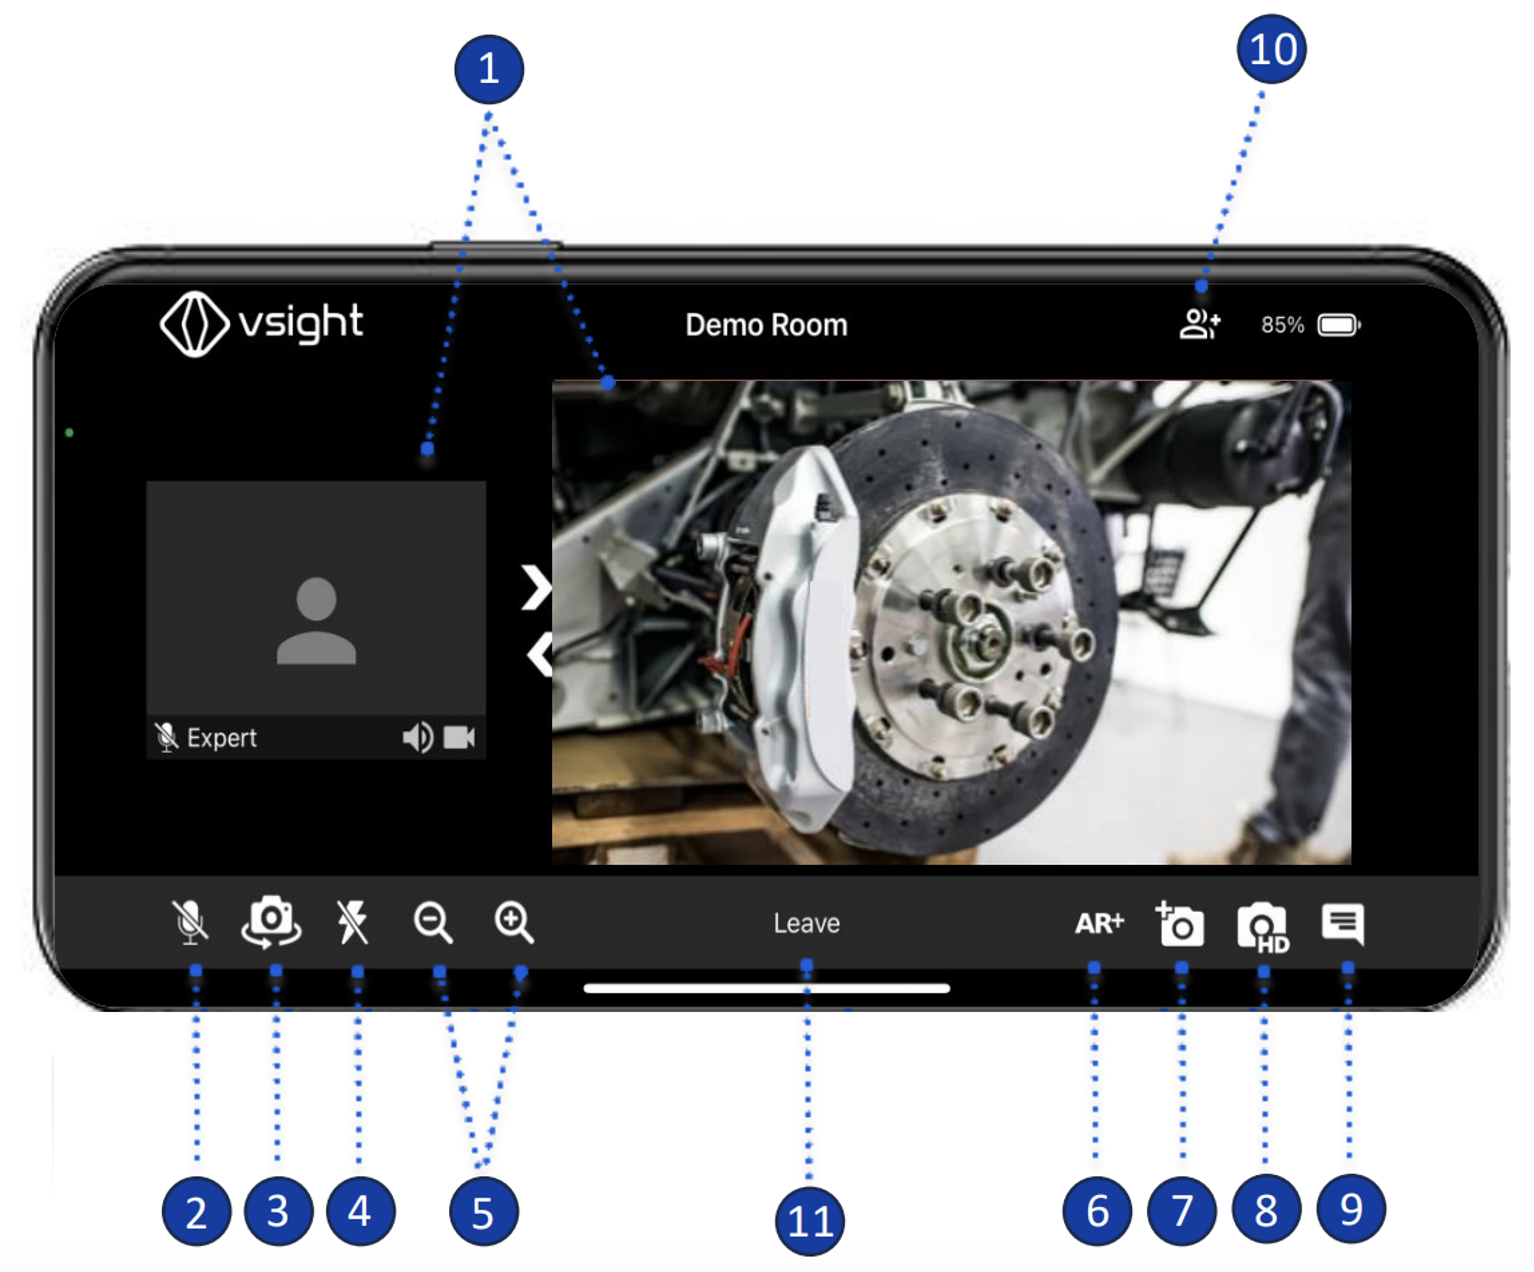
1️⃣ Arrangement of Streams – In regular live stream mode, your camera feed appears in the center of your screen, while the streams of other participants are listed on the left. Use the white arrows to switch between video streams.
2️⃣ Mute Yourself – Use the microphone icon to mute or unmute your microphone.
3️⃣ Switch Camera – Click the rotatable photo camera icon to switch between the front and back camera of your device.
4️⃣ Flash – If your device has a flash, activate it here to increase illumination.
5️⃣ Zoom – Adjust the zoom of your mobile device’s camera.
6️⃣ AR+ Mode – Click on the AR+ icon to initiate Augmented Reality mode. The software scans and recognizes surfaces to place 3D annotations in the live stream.
7️⃣ Snapshot – Take a snapshot of the video live stream with a maximum resolution of 720x1280.
8️⃣ HD Picture – Click on the HD camera icon to take a high-resolution picture, which will be displayed in the chat history for collaboration.
9️⃣ Chat – Send text messages and view the session transcript.
🔟 Add Participants – Click this icon to generate a guest access link and QR code for easy sharing.
1️⃣1️⃣ Leave Session – To exit, tap this button. If the session was started by a call, the caller can choose whether to end the session for all or let participants continue.
📌 Important: Web application users can remotely control your camera’s flash and zoom, as well as take images via the snapshot function.
📌 Important: User interface for smart glasses is identical with numbers added to each function for an easier voice control.
⚠️ Session Duration: The session remains active until the last expert leaves, and meeting links and guest access credentials remain valid until all users exit
📌 Need More Help? – See further information at VSight Help Center or contact support for assistance.