1. Activating Conditions in a Workflow
✅ Conditions require multiple steps in a workflow.
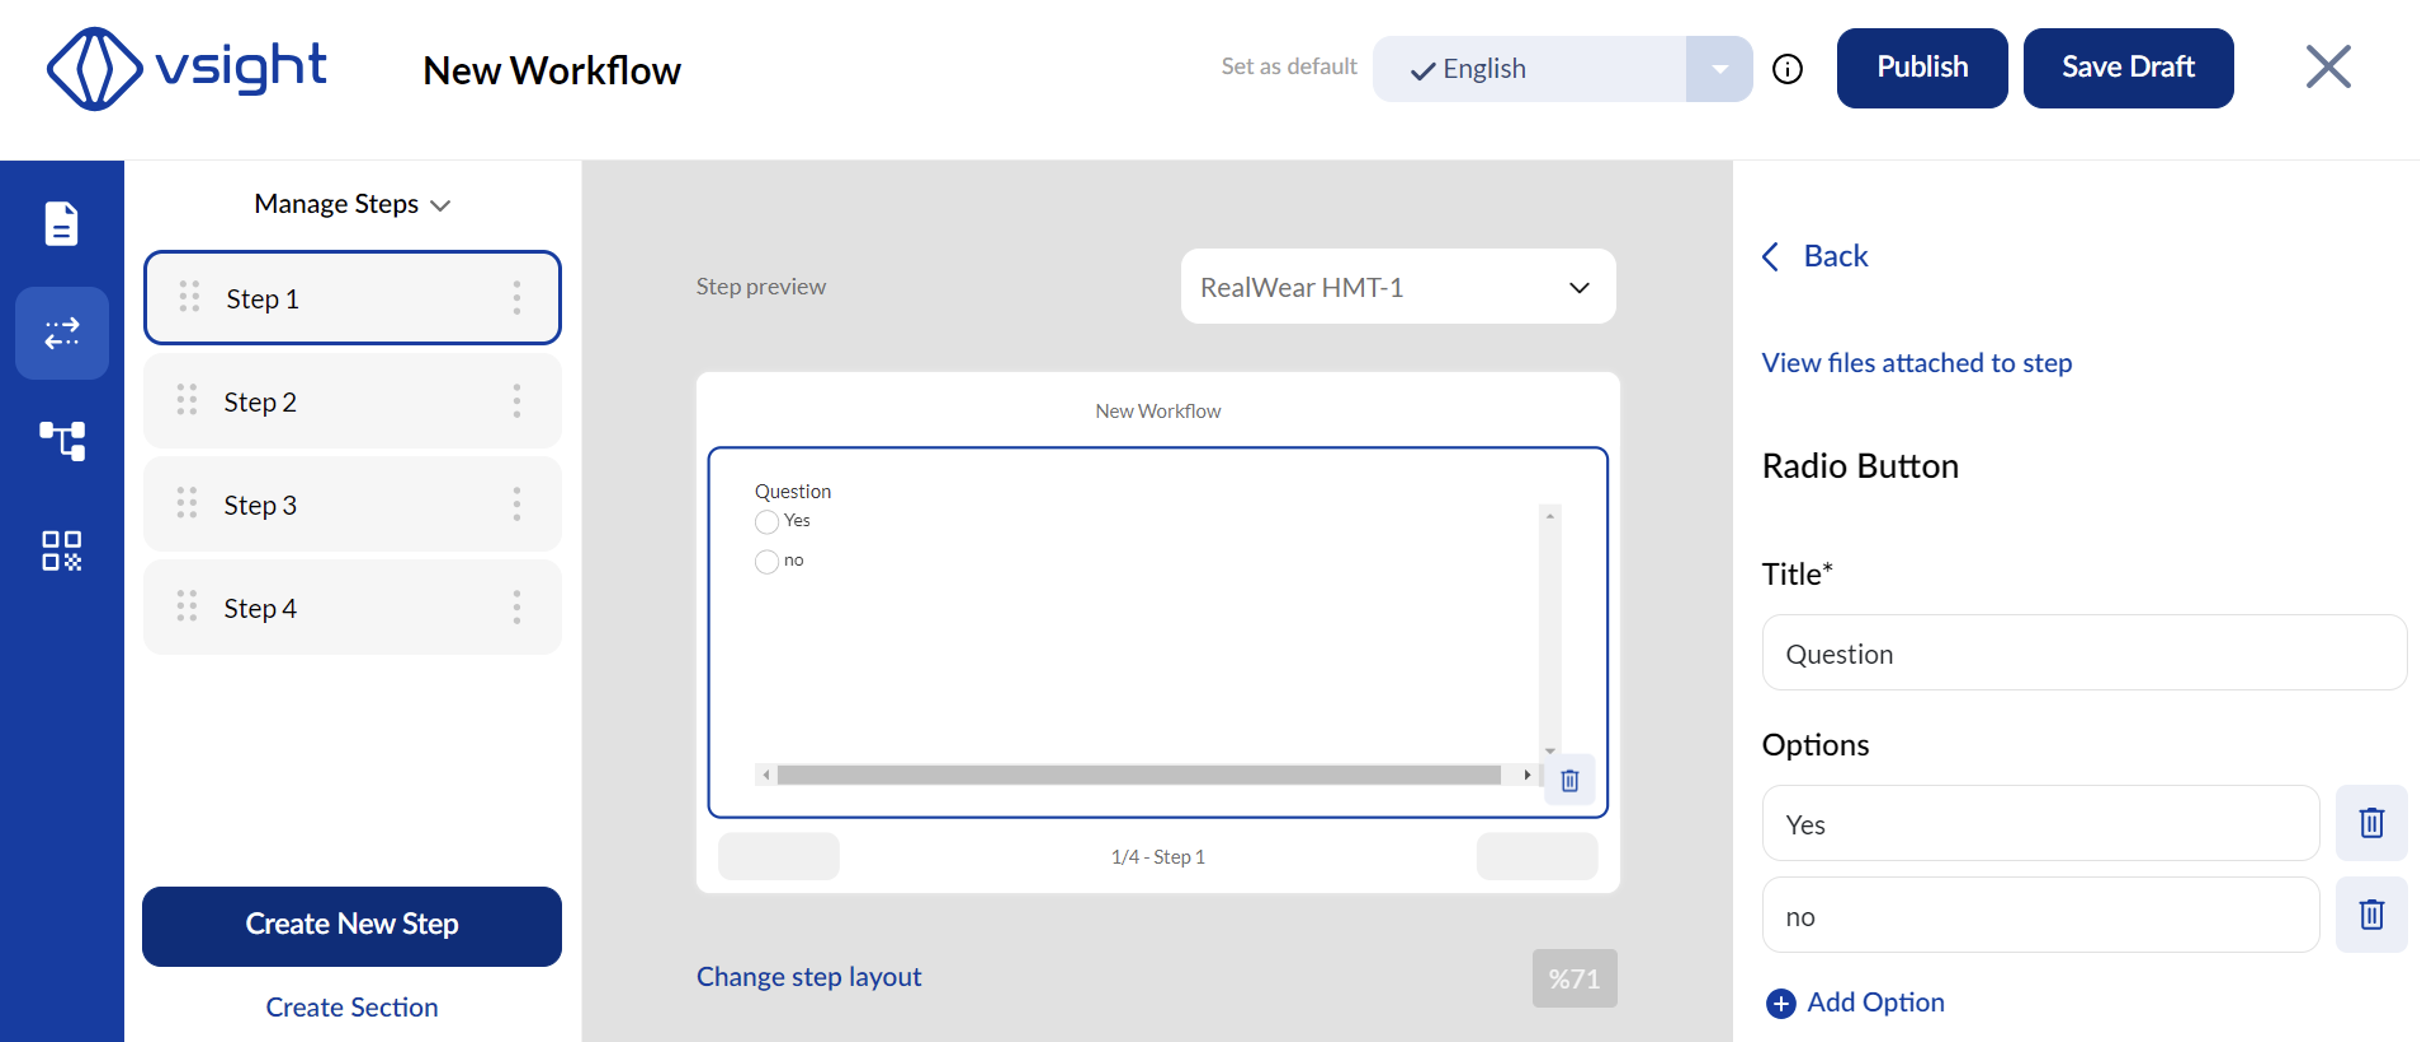
✅ To start, add a radio button or another widget that can be used for decision-making.
✅ Click on Conditions in the menu to configure workflow logic.
⚠️ Important: Once conditions are activated:
-
Steps can no longer be moved in the editor.
-
Newly added steps will stack vertically since their placement is determined by conditions.
-
Connecting or moving steps must be done via the condition menu.
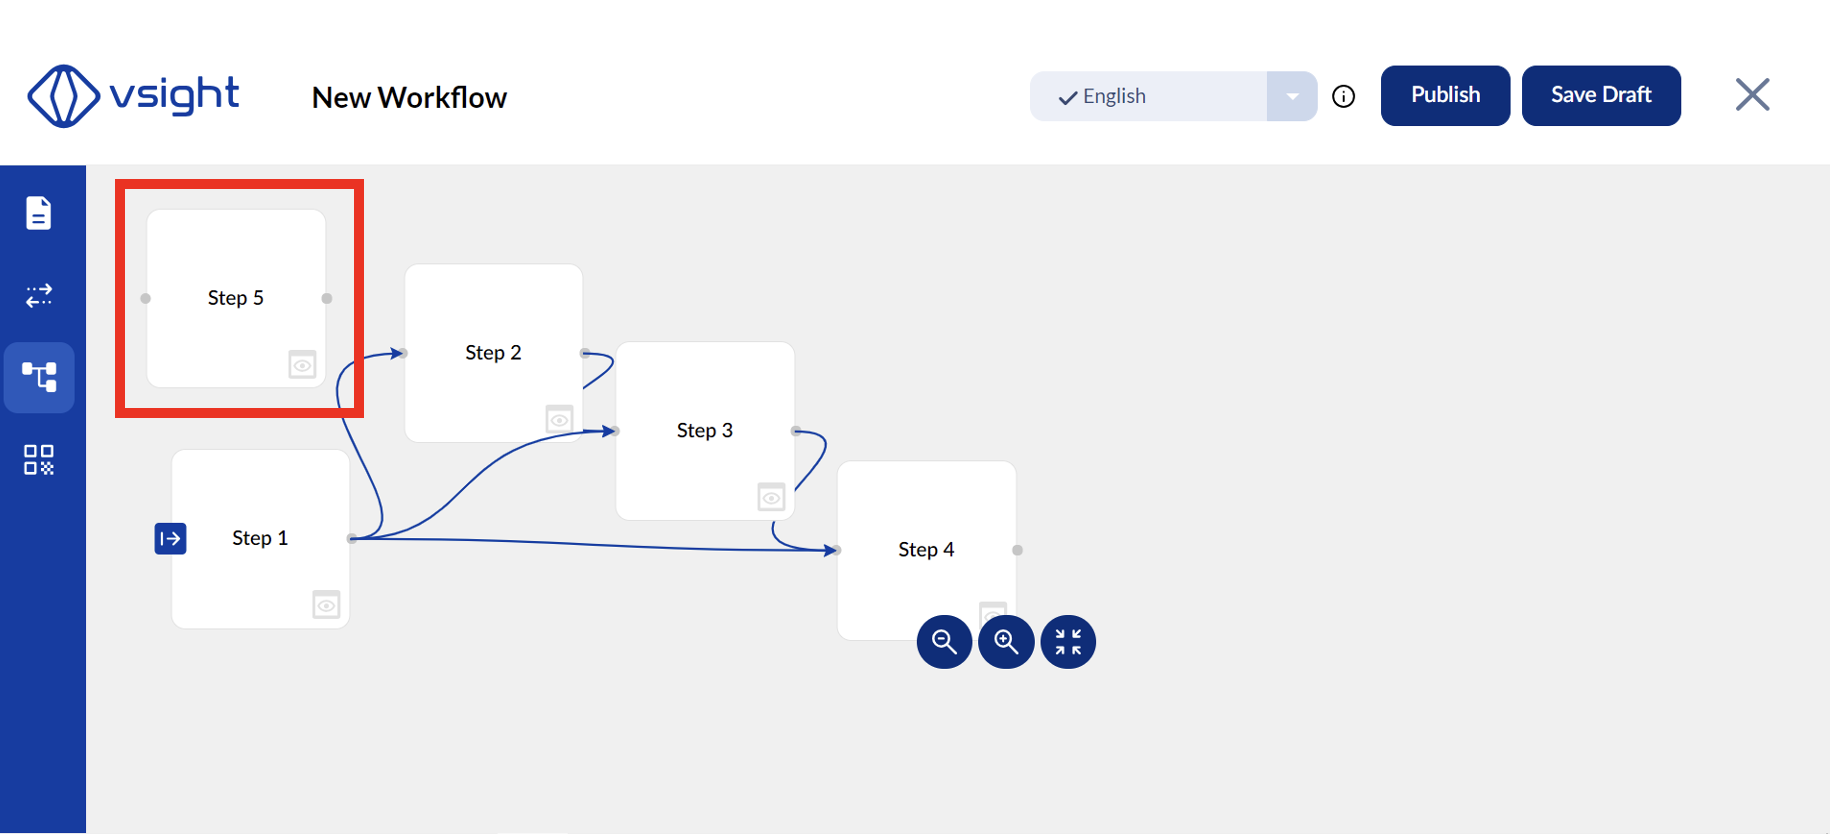
2. Managing the Condition Flowchart
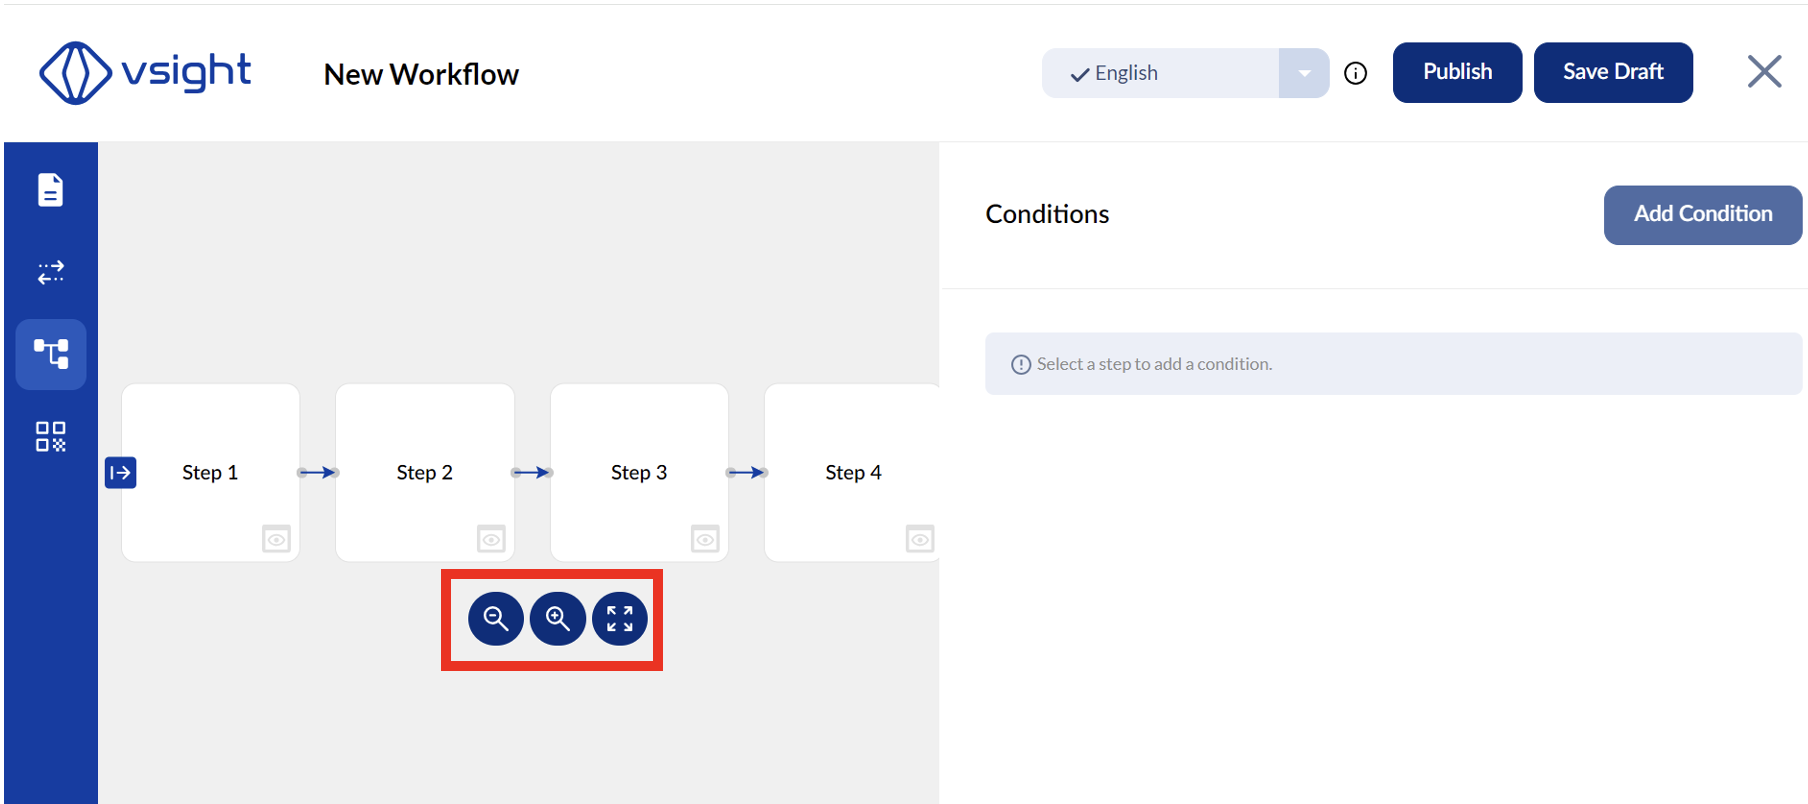
✅ Once conditions are active, a flowchart appears on the left showing connected steps.
✅ The condition menu appears on the right—this can be hidden or resized.
✅ You can zoom in/out on the flowchart for better visibility.
3. Creating & Managing Conditions
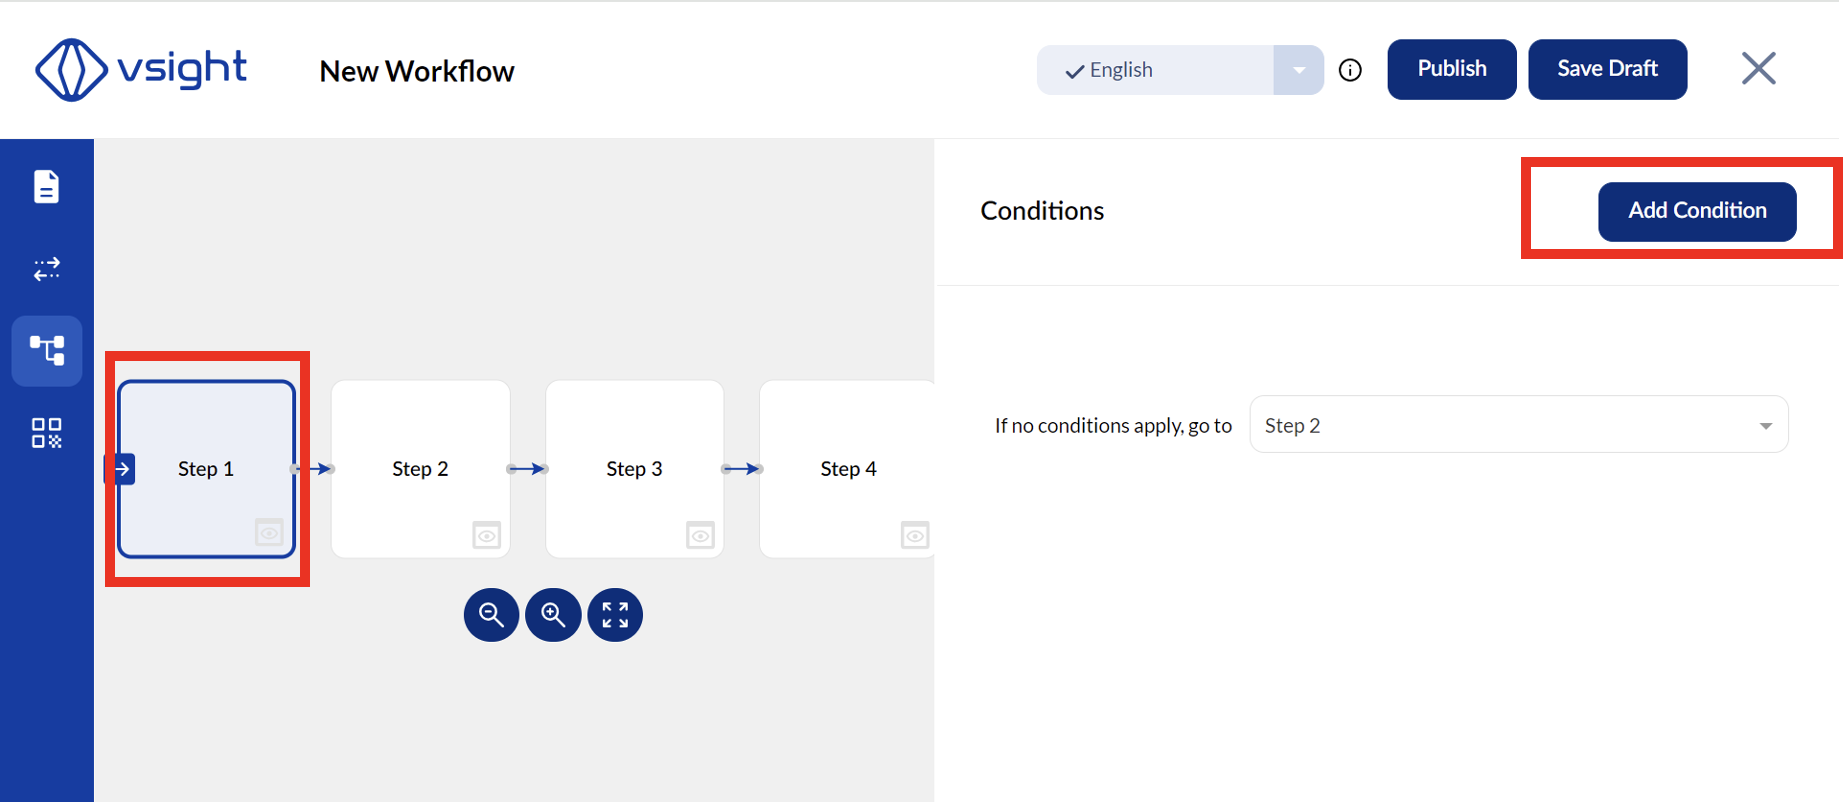
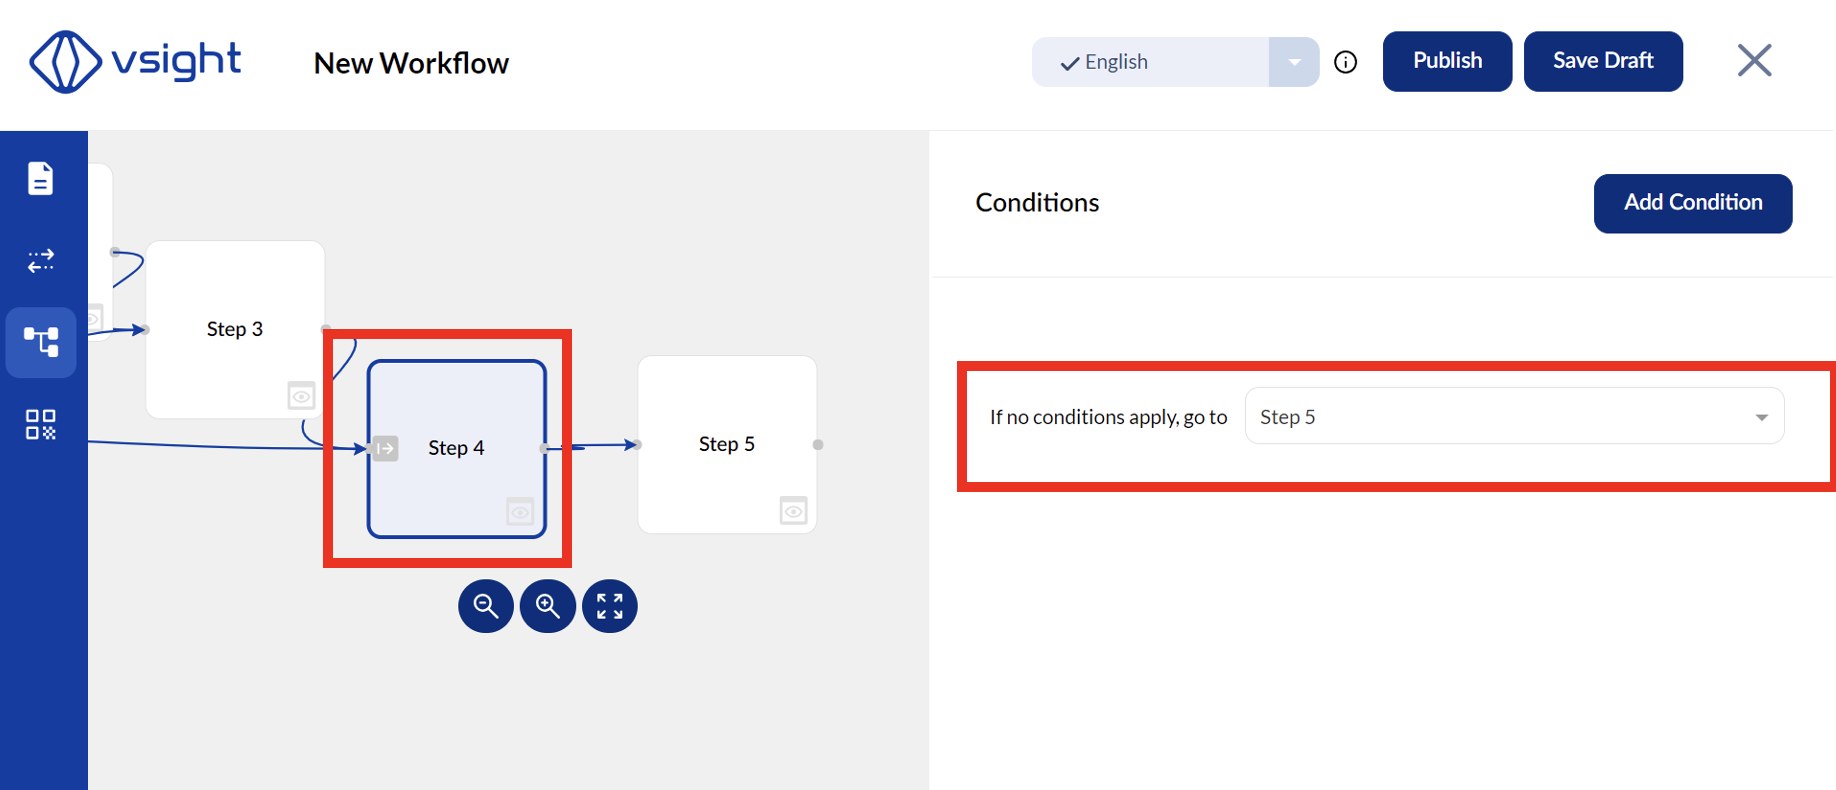
✅ Click on a step in the flowchart to add a condition.
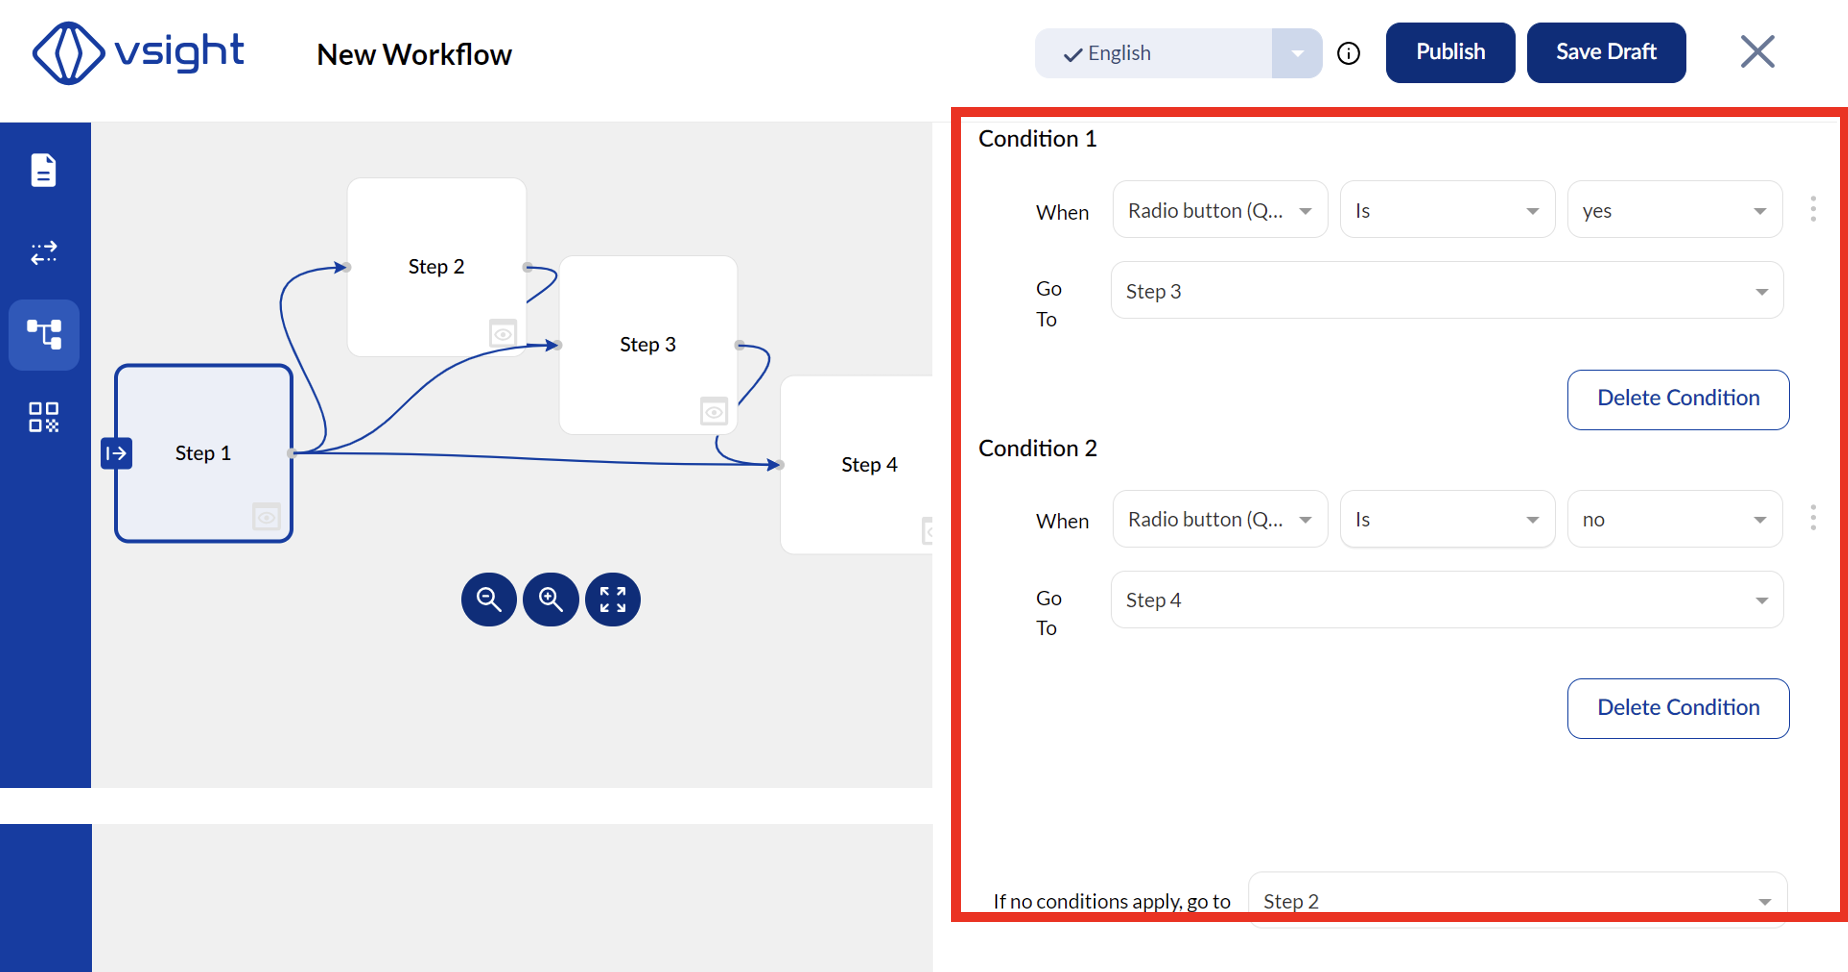
✅ New steps added in the editor will initially appear unconnected in the upper left corner.
✅ Manually drag and drop new steps in the flowchart to position them correctly.
✅ Select what should happen if no condition is met to ensure proper workflow logic.
Using conditions in VSight Workflow allows you to create structured and automated decision-making processes, making workflows more dynamic and responsive.
📌 Need More Help? – See further information at VSight Help Center or contact support for assistance.