What is File Sharing?
VSight Remote allows users to share important files, documents, and images to support remote troubleshooting and collaboration. Experts and co-admins can upload files before or during a session and manage access easily.
Key Features of File Sharing
✅ Upload and share PDFs, images, and documents instantly during a session.
✅ Pre-upload files before a session to ensure quick access.
✅ Send files to session chat for immediate use.
✅ Download shared files for further review.
✅ Store and archive session-related files for future reference.
How to Share Files
On Web Application
1️⃣ Join a Session: Enter a VSight session either via log in or guest access.
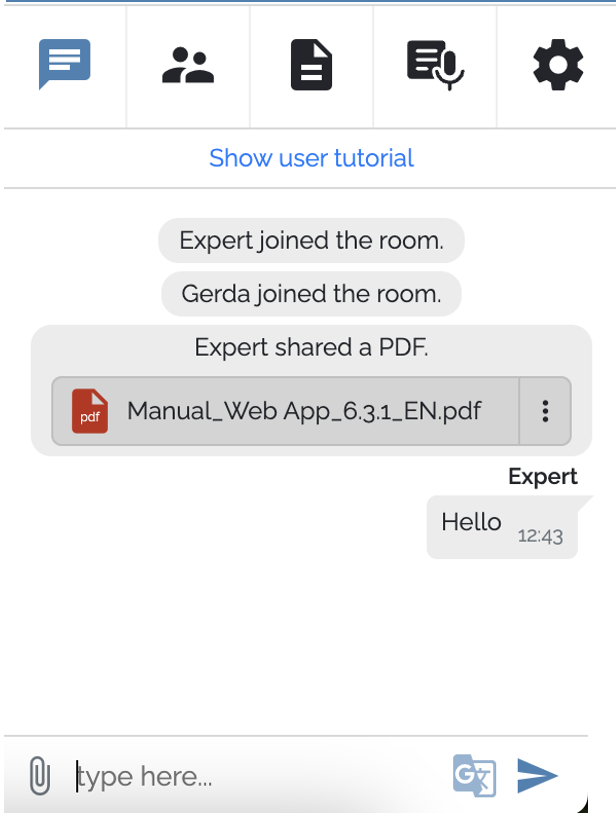
2️⃣ Upload a File: Click on the upload button in the chat window and select the file from your device or simply drag and drop a file to the chat window.
3️⃣ Share with Participants: Once uploaded, the file will be visible to all participants in the session to collaborate.
4️⃣ Download Option: Participants can download shared files for further use by clicking on three dots next to the file.
On Mobile Devices and Smart Glasses
1️⃣ Join a Session: Enter a VSight session either via log in or guest access.
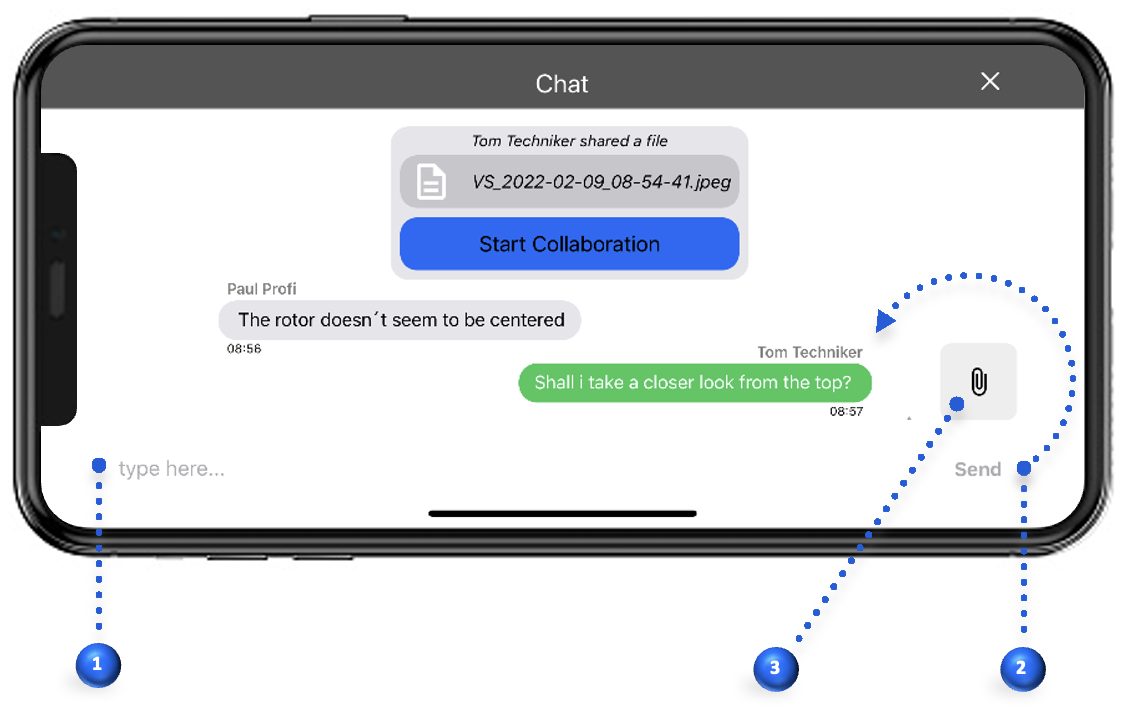
2️⃣ Upload a File: Click on the chat icon, then click the upload button in the chat window and select the file from your device.
3️⃣ Share with Participants: Once uploaded, the file will be visible to all participants in the session.
What is the Files Section?
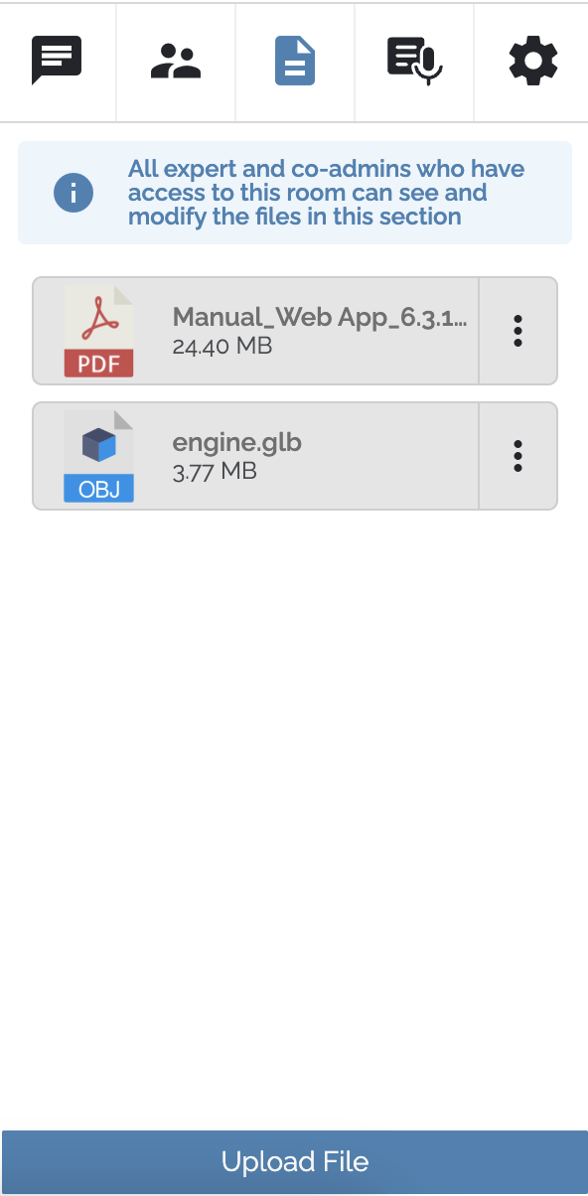
The Files section in VSight Remote is a centralized location where experts and co-admins can store and manage files for remote sessions. This section allows users to upload, organize, and retrieve documents, images, and other essential materials needed for collaboration. The files remain accessible until they are manually deleted, ensuring that relevant data is always available when required.
How to Use the Files Section
1️⃣ Uploading Files – Navigate to the Files section and select the upload option to add documents, images, or other supported file types.
2️⃣ Accessing Files in a Session – Click the three-dot menu next to a file and select “Send to session” to make it available in the chat window.
3️⃣ Archiving Files – Keep session-related images or documents stored safely in the Files section for future reference by sending them from the chat to the files section.
4️⃣ Deleting Files – Remove outdated or unnecessary files to maintain a clean and efficient workspace.
📌 Important:
✔ The files function is only available in Room mode.
✔ To enable file access for subscribers without an expert in a room, contact your account administrator.
✔ The size limit is 500 MB per file. There is no limit on the number of files.
Screen Sharing in VSight Remote
What is Screen Sharing?
Screen sharing in VSight Remote allows users to share their entire screen, application window, or browser tab in real time. This helps remote teams visualize problems, provide guidance, and offer hands-on support.
Key Features of Screen Sharing
✅ Share your screen for live demonstrations and troubleshooting.
✅ Choose specific windows or applications to present.
How to Share Your Screen
1️⃣ Join or Start a Session – Open a VSight Remote Assistance session.
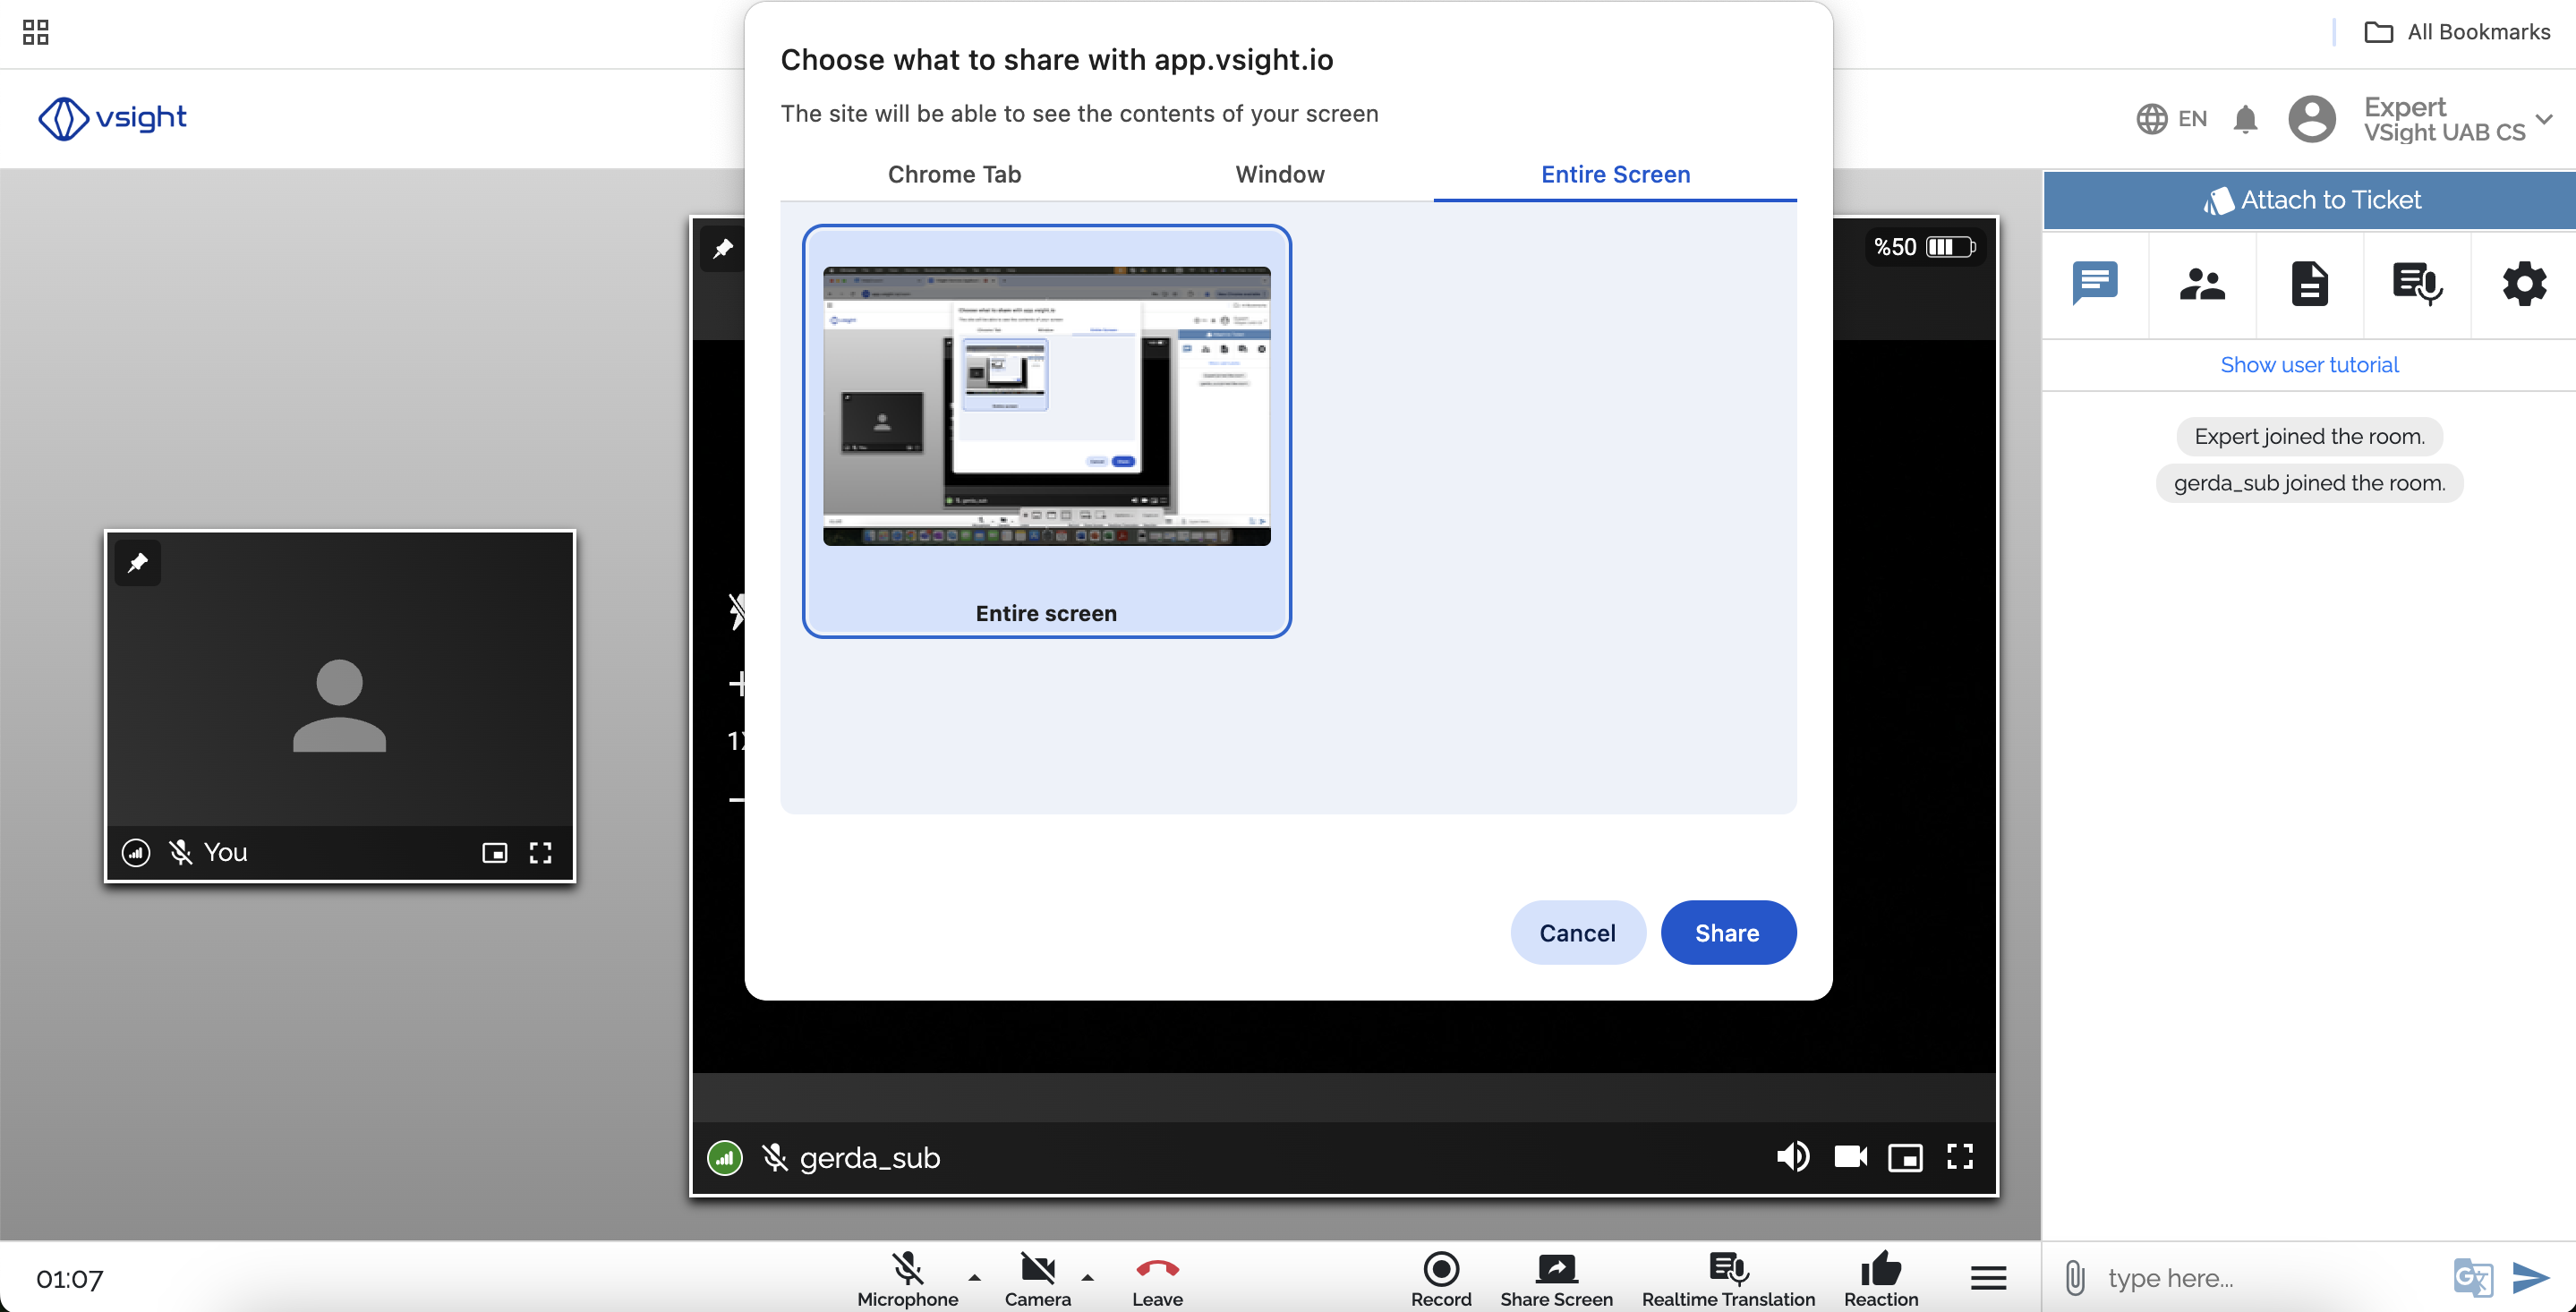
2️⃣ Click on the Screen Share Button – Located in the toolbar.
3️⃣ Select What to Share – Choose full screen, application window, or browser tab.
4️⃣ Start Sharing – Click “Share” to broadcast your screen.
Best Practices for File and Screen Sharing
✅ Ensure a Stable Internet Connection – Prevent interruptions.
✅ Label Shared Files Clearly – Organize files with proper names.
✅ Use High-Quality Documents – Ensure legibility for all participants.
✅ Communicate Before Sharing – Notify users to keep them engaged.
By following these steps, you can maximize the benefits of VSight Remote’s file and screen sharing features, improving workflow efficiency and remote collaboration.
📌 Need More Help? – See further information at VSight Help Center or contact support for assistance.